Import your contacts
CSV import — column mapping, duplicates, unsubscribes, detailed report.
Mailcheer imports contacts from a CSV file (the universal export format: Excel, Google Sheets, Brevo, Mailchimp — all can produce one). The import wizard is at Subscribers → Import.
1. Upload your file
Drag your CSV file into the import area. The delimiter (comma, semicolon…) is detected automatically; blank lines are ignored. The first row must contain column headers.
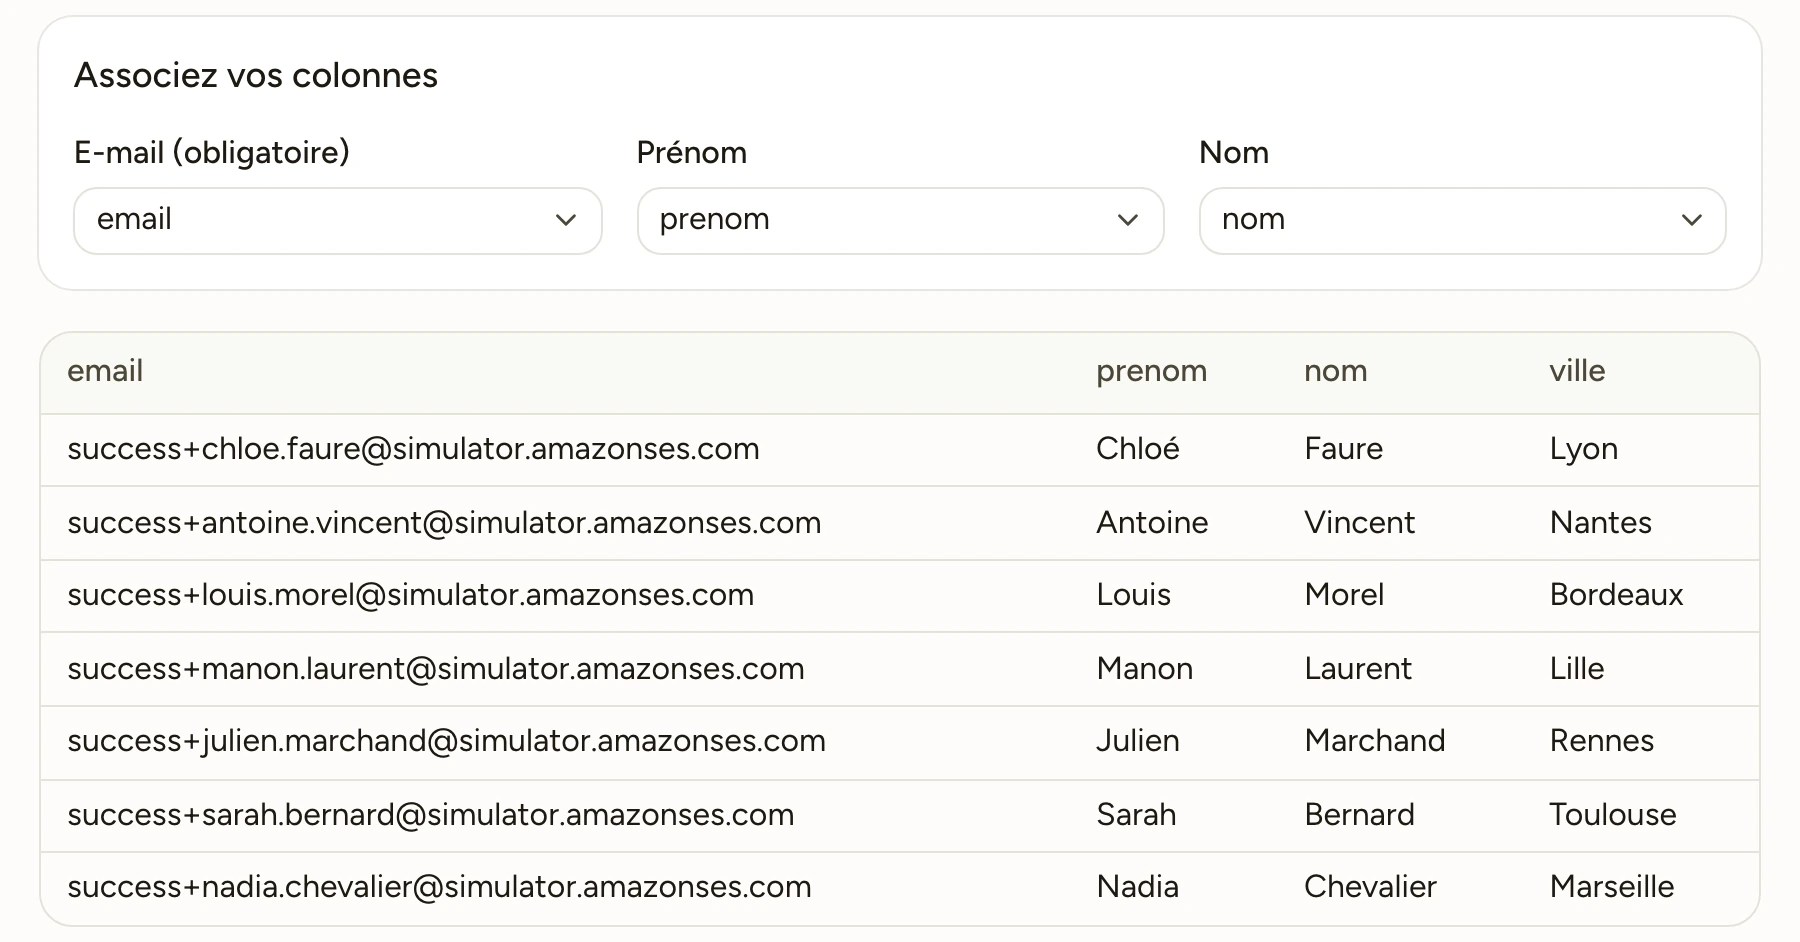
2. Map your columns
Mailcheer shows your columns and a preview of the first rows. You specify:
- the Email column (required);
- the First name and Last name columns (optional);
- columns to ignore.
Columns named "email", "first name", "last name" or their common variants are pre-mapped automatically.
3. Choose your options
- Apply tags: the selected tags are applied to every imported contact.
- Update existing subscribers: if an address already exists in your workspace, its first and last name are updated. Without this option, the row is counted as a duplicate and left unchanged.
- Consent: you confirm that these contacts have agreed to receive your emails. This checkbox is required — it is the foundation of GDPR compliance and good deliverability.
What the import handles for you
| Case | Handling |
|---|---|
| Invalid address | Skipped, counted in the report. |
| Duplicate address within the file | Only one occurrence is kept. |
| Address already in your workspace | Ignored, or updated if you requested it. |
| Address on the suppression list | Imported as unsubscribed — it will never be contacted. |
An unsubscribed contact can never become active again through a plain import: this is intentional and cannot be bypassed.
4. The report
At the end, a report counts everything: imported, updated, duplicates, invalid addresses, addresses on the suppression list. You can download it for your records.
The import is fast: a file of 10,000 rows is processed in about one and a half seconds.
Next step
Your contacts are in: verify your sending domain.